

Description
The USB to ESP8266 module is a hardware device that allows for easy communication between a computer or other USB-enabled device and an ESP8266 microcontroller. This module typically includes a USB connector on one end and a serial or UART interface on the other end, allowing for data transfer and programming of the ESP8266.
The features:
- USB connectivity: Allows for easy connection to a computer or other USB-enabled device for data transfer and programming.
- Serial or UART interface: Provides a communication interface to connect with the ESP8266 microcontroller.
- Power supply: Some modules may include a voltage regulator to provide a stable power supply to the ESP8266.
- Programming support: Enables programming of the ESP8266 microcontroller using a USB connection.
- LED indicators: Some modules may include LED indicators to show power and data transmission status.
- Compact size: Designed to be small and portable for easy integration into projects.
- Compatibility: Supports various operating systems and programming environments.
Now follow these steps to get your first sketch into ESP01:
- Firstly, connect push button between GPIO0 and GND
- Connect ESP01 to the CH340 Module we have prepared.
-
- Push and hold the button and insert it into your PC, then release it.
-
- Download and install CH340 Drivers from here, google it if this link doesn’t work for you, it is easy to find.
- Download and install Arduino IDE from here.
- Go to File>Preferences, locate ‘Additional Boards Manager URLs‘ tab and paste ‘http://arduino.esp8266.com/stable/package_esp8266com_index.json‘ into it without the quotes and click on OK.

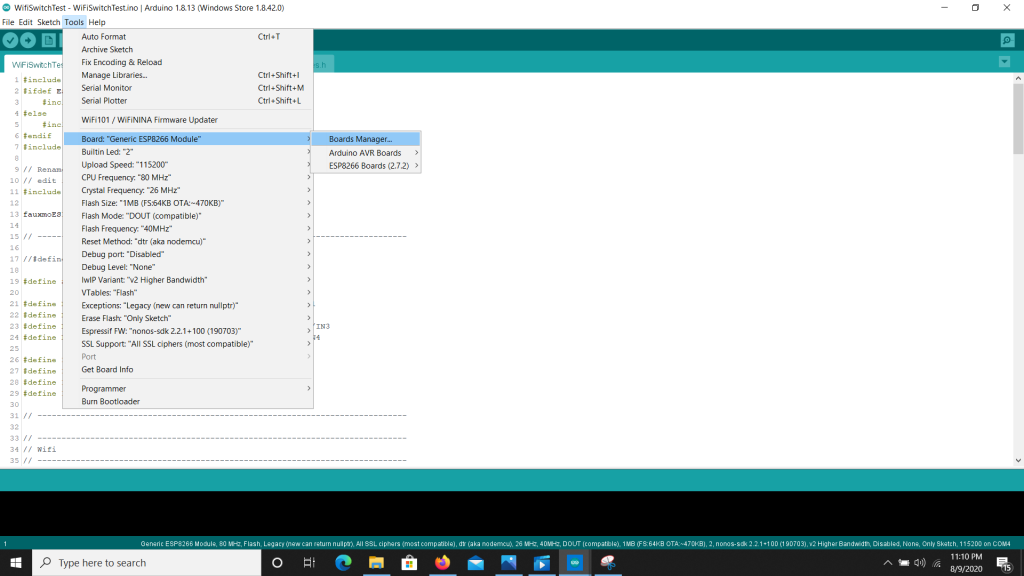
7. Go to Tools>Boards>Board>Boards Manager… Don’t worry if the window doesn’t look the same as below, you might have something else written on Board:”” part.
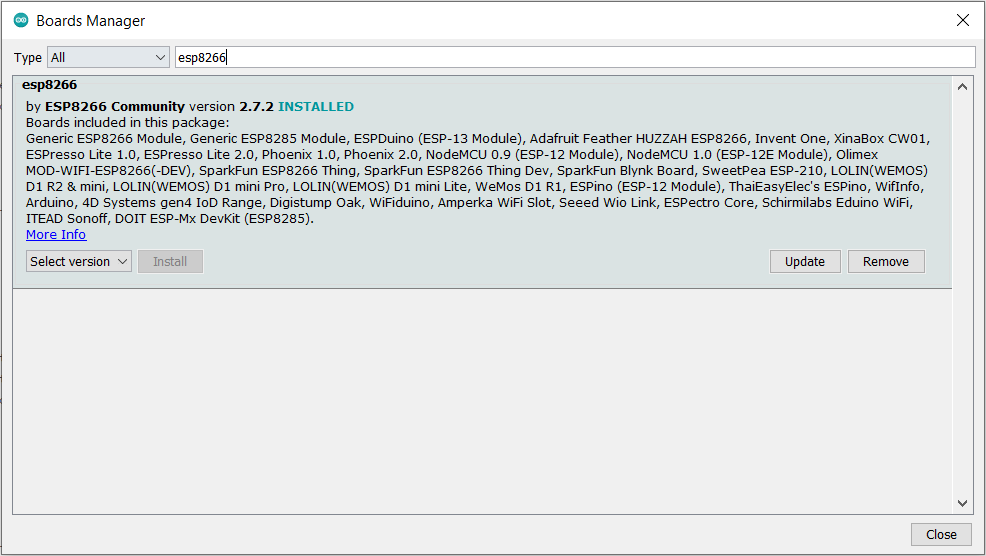
8. Search for ‘esp8266’ in the search box and then click install button on the entry titled ‘esp8266 by ESP8266 Community’.
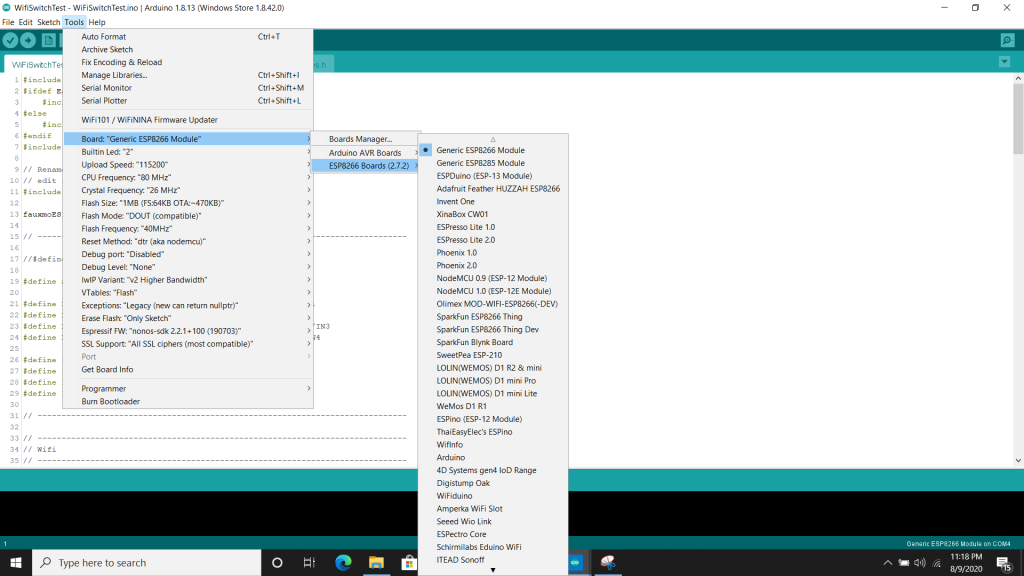
9. Once the installation is done close the window and then go to Tools>Board>ESP8266 Boards> and select ‘Generic ESP8266 Module’.
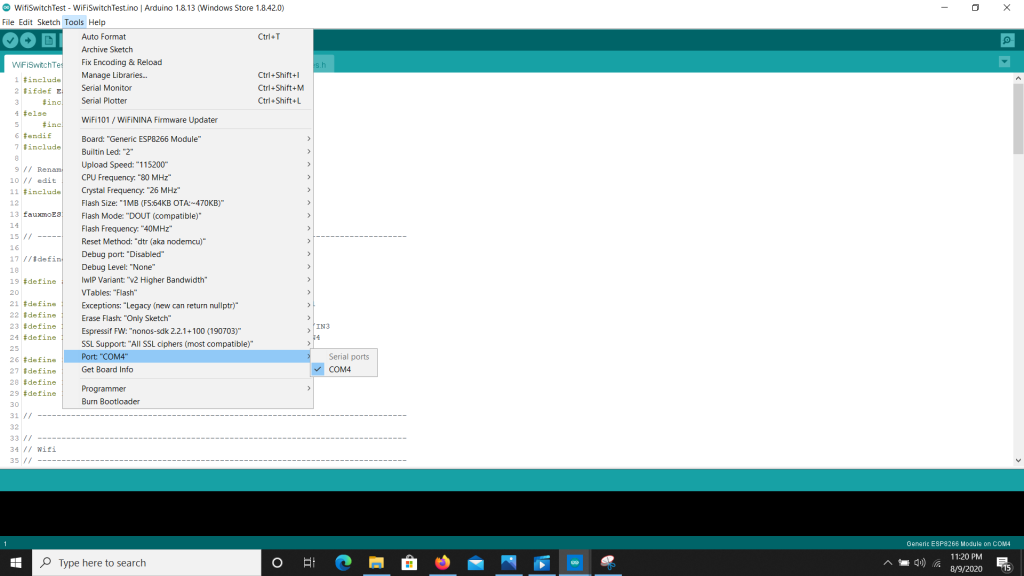
10. Go to Tools>Port> and select the right COM port, yours might be named differently. Check your device manager on windows if you are confused.
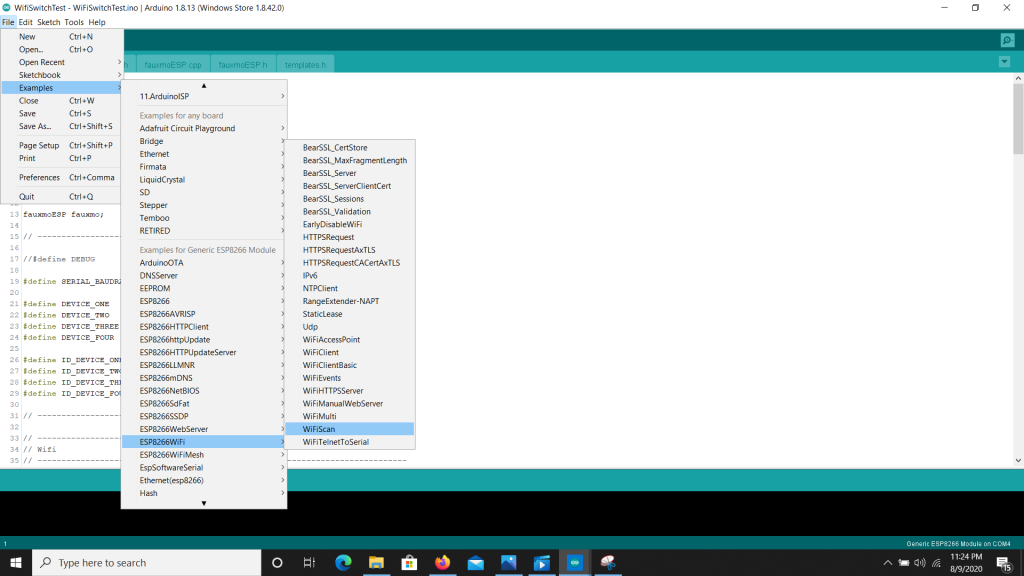
11. We will now try and upload an example sketch which will show you the networks in your area. Go to File>Examples>ESP8266WiFi> and click on WiFiScan.
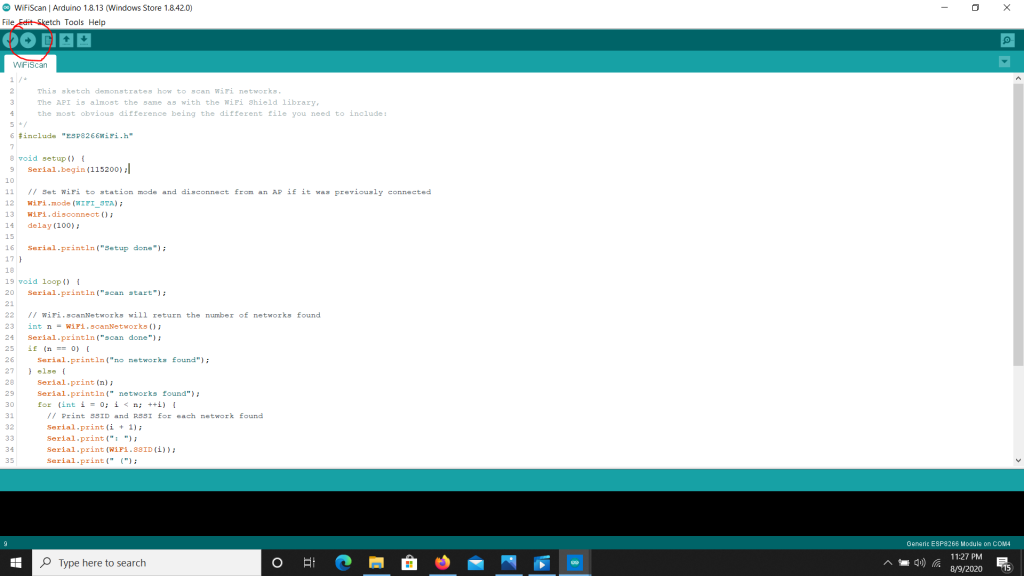
12. Once the sketch window opens, click on the upload button.
13. The IDE will compile the code and upload the sketch into your ESP01 module. Once it is uploaded take out the CH340 module and plug it back in, this time without pressing the button, the CH340 module can now be used as a serial communication device.
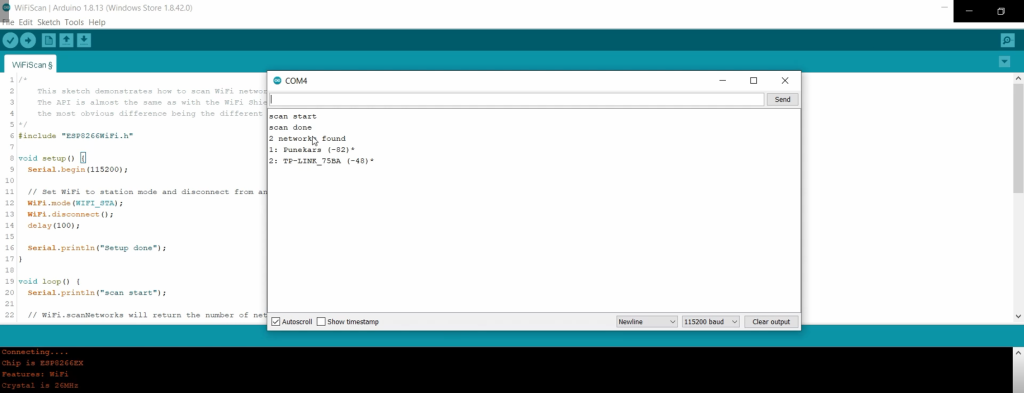
14. Go to your IDE and click on the serial monitor button on the top right corner. That will launch your serial monitor and you can see the networks being listed there!
15. Try your own code and enjoy!
Package Include:

1x USB to esp8266 Module
Reviews
There are no reviews yet.