Description
Getting Started with the ESP32 Development Board
This article is a getting started guide for the ESP32 development board. If you’re familiar with the ESP8266, the ESP32 is its sucessor. The ESP32 is loaded with lots of new features. The most relevant: it combines WiFi and Bluetooth wireless capabilities and it’s dual core.
STEP1 :Hardware required
Here’s a list of the parts you need to build this previous circuit:
Step2: Connecting the Hardware
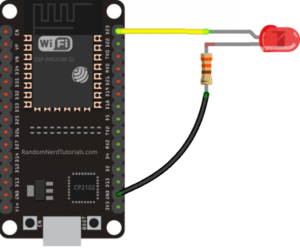
So, connect 330 ohm resistor and an LED to your ESP32 by following the next schematic diagram.
Important: always check the pinout for your specific board before building any circuit.
Step3: Example
Plug your ESP32 development board to your computer and follow these next instructions:
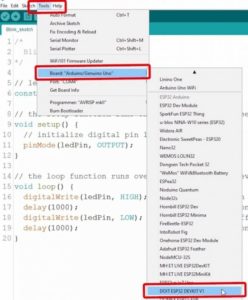
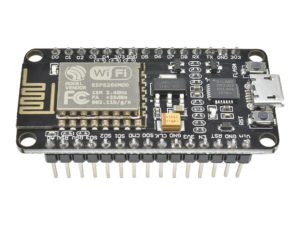
1. Go to Tools > Board, scroll down to the ESP32 section and select the name of your ESP32 board. In my case, it’s the DOIT ESP32 DEVKIT V1 board.
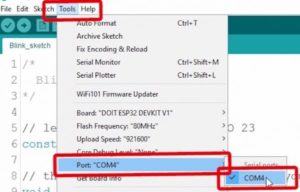
2. Go to Tools > Port and select a COM port available.
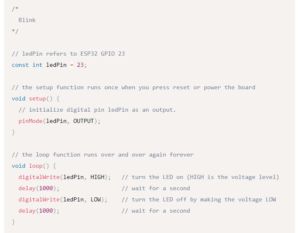
To show you how to upload code to your ESP32 board, we’ll build a simple example to blink an LED.
Copy the following code to your Arduino IDE:
3. Press the upload button.
That’s it!
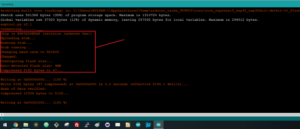
Note: If you get the following error when trying to upload code, it means that your ESP32 is not in flashing/uploading mode.
Failed to connect to ESP32: Timed out... Connecting...
To upload code, you need to follow the next steps (make sure you have the right board selected:
4. Hold-down the “BOOT” button in your ESP32 board

5. After you see the “Connecting….” message in your Arduino IDE, release the finger from the “BOOT” button:
After that, you should see the “Done uploading” message.
That’s it. After uploading the new sketch, you can press the “ENABLE” button to restart the ESP32 and run the new uploaded sketch.
Installing the ESP32 Board in Arduino IDE
There’s an add-on for the Arduino IDE that allows you to program the ESP32 using the Arduino IDE and its programming language. In this tutorial we’ll show you how to install the ESP32 board in Arduino IDE whether you’re using Windows, Mac OS X or Linux.
Before starting this installation procedure, make sure you have the latest version of the Arduino IDE installed in your computer. If you don’t, uninstall it and install it again. Otherwise, it may not work.
To install the ESP32 board in your Arduino IDE, follow these next instructions:
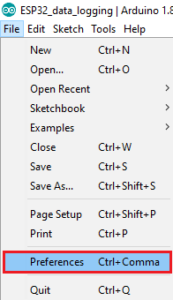
Step1: In your Arduino IDE, go to File> Preferences
Step2: Enter https://dl.espressif.com/dl/package_esp32_index.json into the “Additional Board Manager URLs” field as shown in the figure below. Then, click the “OK” button:
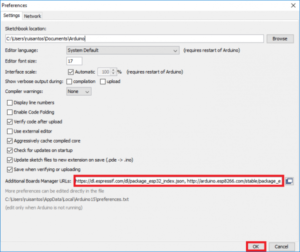
Note: if you already have the ESP8266 boards URL, you can separate the URLs with a comma as follows:
https://dl.espressif.com/dl/package_esp32_index.json, http://arduino.esp8266.com/stable/package_esp8266com_index.json
Step3: Open the Boards Manager. Go to Tools > Board > Boards Manager…

Step4: Search for ESP32 and press install button for the “ESP32 by Espressif Systems“:
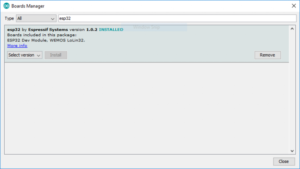
Step5: That’s it. It should be installed after a few seconds.
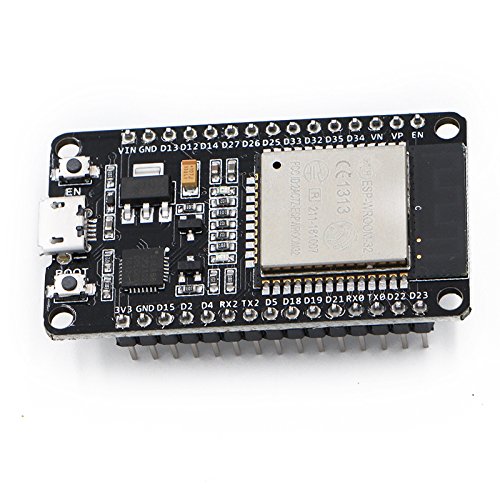
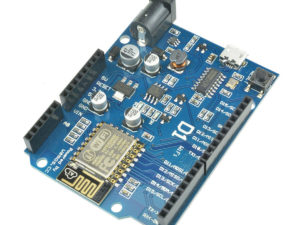
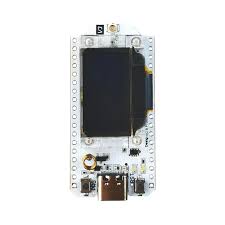
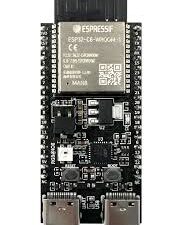
Package includes:
1×ESP32 Development Board (without USB Cable)
Reviews
There are no reviews yet.