Description
GY-BME280-3.3 BME280 Atmospheric Pressure Sensor Module.ME-BME280 is a Breakout Board featuring a Bosch Sensortec ME280 Temperature, Humidity & Pressure Sensor. It can be used to measure temperature and atmospheric pressure accurately. It can be connected to a microcontroller with I2C. As the atmospheric pressure changes with altitude, it can also measure approximate altitude of a place. We have also provided highly abstracted library to make this product easier to use.
ME-BME280 is a Breakout Board featuring a Bosch Sensortec ME280 Temperature, Humidity & Pressure Sensor. The board has selectable I2C address jumper (solder link GS2), I2C pull-up resistors, 7 pin header 2.54mm, and two mounting holes 3.5mm. Default setting of the board; single power rail Vdd=Vdd_IO (solder link GS1), pull-ups resistors (R2, R3) 10k, protocol selector resistor 0ohm (R1), decoupling capacitors 0.1uF on both power supply pins Vdd & Vdd_IO.
If you connect board to both power rails VDD_IO 1.8V and VDD 3.3V be sure to remove the power rail jumper GS1!
Features:
- Package 2.5 mm x 2.5 mm x 0.93 mm metal lid LGA
- Digital interface I2C (up to 3.4 MHz) and SPI (3 and 4 wire, up to 10 MHz)
- Supply voltage VDD main supply voltage range: 1.71 V to 3.6 V
- VDDIO interface voltage range: 1.2 V to 3.6 V
- Current consumption 1.8 uA @ 1 Hz humidity and temperature
- 2.8 uA @ 1 Hz pressure and temperature
- 3.6 uA @ 1 Hz humidity, pressure and temperature
- 0.1 uA in sleep mode
- Operating range -40…+85 C, 0…100 % rel. humidity, 300…1100 hPa- Humidity sensor and pressure sensor can be independently enabled/disabled
Getting started with the BMP280 Pressure Sensor Module
This GY-BMP280-3.3 pressure sensor module Arduino tutorial shows how to connect a pressure sensor module to Arduino and how to read pressure and temperature from the device.
Pin Description
- Pin1: Vcc: This is the power pin. Connect 3.3V DC supply at this pin.
- Pin2: GND: Ground pin
- Pin3: SCL: This is the serial clock pin for the I2C interface.
- Pin4: SDA: This is the serial data pin for the I2C interface.
- Pin5: CSB: The chip select pin selects the I2C or SPI interface. It selects the SPI interface when provided with low signal or grounded. On applying a HIGH signal of 3.3V, this pin will select the I2C interface.
- Pin 6: SDO: It is the serial data output pin that sends out the output value.
Where to use it?
As already mentioned in the features section, this module consists of both IC and SPI. Due to this feature, you can interface or connect this sensor with Arduino and any other microcontroller using either I2C or SPI interface. It is used in weather sensing applications. This low-cost sensor provides precise values of barometric pressure and temperature with ±1 hPa and ±1.0°C accuracy. As it can measure pressure which changes with altitude, therefore, it can also measure altitude. You can use the BMP280 module as an altimeter also which gives readings with an accuracy of ±1 meter.
How to use BMP280?
Connect the power supply pins Vcc and GND to 3.3 volts and ground of a circuit. Now, you need to select the digital interface. For I²C, connect chip select pin (CSB) to Vcc otherwise connect it to the ground or leave it unconnected. Set the I²C address. If you want to set 0x77 address, connect the SDO pin to Vcc. To set 0x76 address, leave the pin unconnected. This module does not contain any onboard voltage regulator or a level shifter. Therefore, for connecting it to devices whose operating voltage is 5V or any voltage other than 3.3V, you need a level shifter and voltage regulator.
Step1: Hardware required
Step2: Connecting the Hardware
In this example connect the following BMP280 pins to the Arduino respectively, VCC to 3.3V, GND to GND, SCL to A5, SDA to A4 and SDO to 3.3v
Step3: Setting up the library
Before we get to the actual code you will need to install the following libraries:
Once the libraries are downloaded, place them in the Arduino>Libraries folder. Go to the Adafruit_BMP_280 library folder and open Adafruit_BMP280.h using notepad. Find the I2C address and change it to 0x76 (see photo). Save and close.
Step4: Upload the sample sketch
Download and upload the attached sketch.
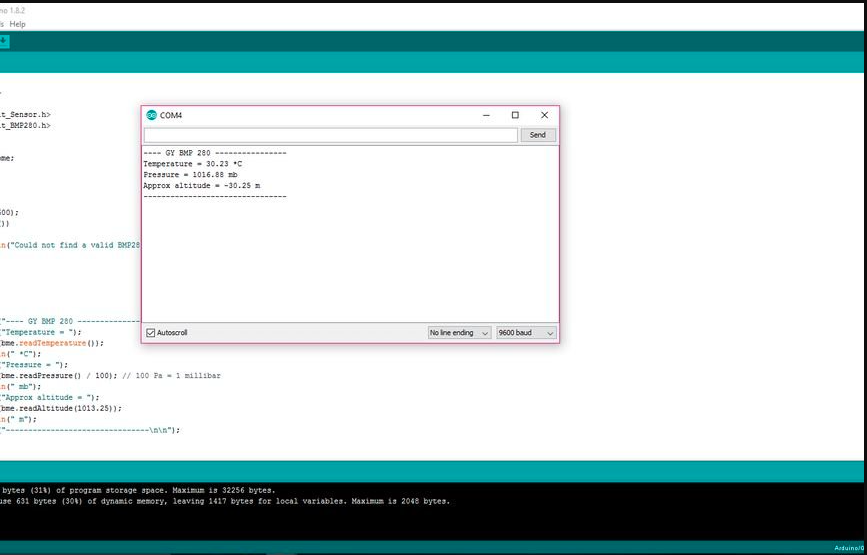
Step5: Testing the circuit
Use the serial monitor to see what your new sensor is picking up.