Description
Specification
- Resolution: 128*64
- Display area: 29.42 x 14.7mm/1.16″*0.58″
- Driving voltage: 3.3-5V
- Operating temperature: -40 ° to 70 °
- Interface type: IIC interfac
- Application: Smart watch, MP3, thermometer, instruments, DIY projects, etc
Pin definitions
- 1> GND (power ground)
- 2> VCC (positive power supply)
- 3> SCL (clock line)
- 4> SDA (data line)
Getting started with the 1.3 Inch OLED White Color 128X64
This article shows how to use the SSD1306 1.3 inch I2C OLED display with the Arduino. We’ll show you some features of the OLED display, how to connect it to the Arduino board, and how to write text “HELLO WORD”
Step1: Hardware required
- Arduino UNO
- OLED 1.3 inch
- Jumper wire
Step2: Connecting the Hardware
Wiring the OLED display to your Arduino is pretty straightforward:
| Pin | Wiring to Arduino Uno |
| VCC | 5V |
| GND | GND |
| SCK/SCL | A5 |
| SDA | A4 |
Step3: Setting up the library
To control the OLED display you’ll need the “U8glib” library. install the library by extracting that zipped file in the library folder as shown below

Step4: Upload the sample sketch
open the sample sketch that is located in file>examples>U8glib>hello word. and upload it. as shown below

Uncoment this line before to upload

Step5: Testing the circuit
After uploading the code, this is what you’ll get in your OLED:

Connecting 1.3 inch I2C OLED display to NodeMCU ESP8266
Sometime you may need to connect your OLED to NodeMCU ESP8266 with different purposes. In this part we would like to give a brief introduction that can help you to connect your OLED to ESP8266. Note that this process also can work with Arduino as well by connecting your OLED as shown in previous part.
Connecting OLED to ESP8266
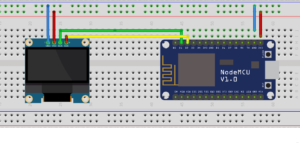
- GND to GND
- VCC to 3.3V of NodeMCU
- SCL to D1
- SDA to D2
Before Adding Library, make sure you have added ESP8266 Board in your Arduino. You can reference yourself here.
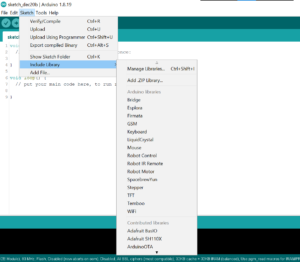
Adding Library to Arduino IDE
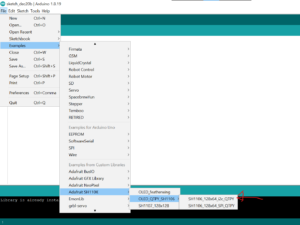
- Go to Sketch and go to Manage Libraries
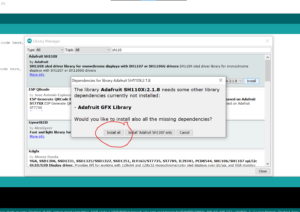
- Search for SH110X and click install
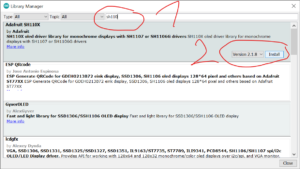
- Click install all to make sure all dependency libraries are installed including GFX
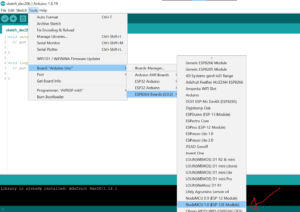
- After adding Libraries, go to Tools and select the board. Here it is ESP-12E Module.
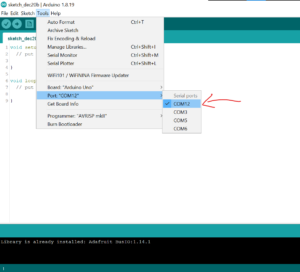
- Select the port for your module (in my case is COM12)
- After upload the example sketch for your type (I2C/SPI)
The program make the 1.3 inch OLED display display defaul program for adafruit. It’s now your time to make the desired changes.
Package includes:
1×1.3 Inch OLED White Color 128X64