Description
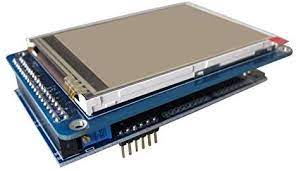
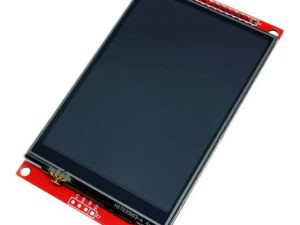
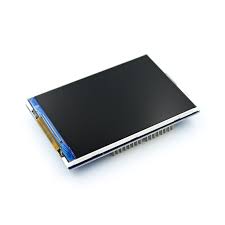
The 3.5″ 320×480 ILI9486 TFT LCD Arduino Shield is a 3.5-inch TFT LCD module with 320×480 resolution and 65K color display. It uses 8-bit line parallel port communication, and the driver IC is ILI9486. The module includes an LCD display, 5V~3.3V level conversion circuit, which can be directly plugged into the Arduino UNO and MEGA2560 development boards, and also supports SD card expansion function.
Product Features
- Input Voltage: DC 3.3-5.5V
- Screen Size: 3.5″
- Screen Material: TFT
- Resolution: 320X480
- Drive IC: ILI9486
- Interface mode: parallel 8 bit
- Module Pin: 28Pin (8+8+6+6)
- Touch: No
- Module Size: 55x85mm/2.17×3.35″
- Expandability: Many models include an integrated microSD card slot, allowing users to store and display images or data easily, which is useful for projects like data visualization or photo frames.
- Backlight Control: The bright 4-white LED backlight can often be controlled via a digital pin, providing power management options.
Getting started with the 3.5″ 320×480 ILI9486 TFT LCD Arduino Shield Plug and Play
Testing the TFT LCD 3.5 inch 480×320 Screen with an Arduino Uno.
Hardware required
- 3.5″ 320×480 TFT LCD Arduino Shield
- Arduino UNO
Step 1: Install the Necessary Libraries
The DIYables TFT Shield library is specifically designed for your shield and is an extension of the Adafruit GFX library.
- Open the Arduino IDE.
- Navigate to Sketch > Include Library > Manage Libraries to open the Library Manager.
- Search for DIYables TFT Shield and click Install. This should also automatically install the required Adafruit GFX library.
- Alternatively, you can download the library as a ZIP file from the GitHub repository and install it using Sketch > Include Library > Add .ZIP Library.
Step 2: Connect the 3.5″ 320×480 ILI9486 TFT LCD Arduino Shield
The shield is designed for direct plug-and-play compatibility with the Arduino Uno.
- Carefully align the pins of the 3.5″ TFT LCD shield with the headers on your Arduino Uno board.
- Gently push the shield down until it is securely seated on the Uno board. No external wiring is needed for a non-touch shield.
Step 3: Load a Test Example Sketch
The library includes example sketches to help you get started.
- In the Arduino IDE, go to File > Examples.
- Scroll down to find the DIYables TFT Shield examples.
- Select an example sketch, such as ShowTextAndNumber or DrawImage, to test basic graphics and text functions.
Step 4: Configure and Upload the Code
The library examples should work out of the box with the non-touch shield for the Arduino Uno.
- Select your board: Go to Tools > Board > Arduino AVR Boards and select “Arduino Uno”.
- Select the correct COM port: Go to Tools > Port and choose the port your Arduino Uno is connected to.
- Compile the program: Click the Verify (checkmark) button to compile the code and check for errors.
- Upload the program: Click the Upload (right arrow) button to upload the sketch to your Arduino Uno.
Example Sketch:
#include <DIYables_TFT_Shield.h>
#define MAGENTA   DIYables_TFT::colorRGB(255, 0, 255)
#define WHITE     DIYables_TFT::colorRGB(255, 255, 255)

DIYables_TFT_ILI9486_Shield TFT_display;

void setup() {
  Serial.begin(9600);
  Serial.println(F("Arduino TFT LCD Display - show text and float number"));
  TFT_display.begin();

  // Set the rotation (0 to 3)
  TFT_display.setRotation(1);  // Rotate screen 90 degrees
  TFT_display.fillScreen(WHITE);

  // Set text color and size
  TFT_display.setTextColor(MAGENTA);
  TFT_display.setTextSize(3);  // Adjust text size as needed

  // Sample temperature value
  float temperature = 23.5;
  float humidity = 78.6;

  // Display temperature with degree symbol
  TFT_display.setCursor(20, 20);    // Set cursor position (x, y)
  TFT_display.print("Temperature: ");
  TFT_display.print(temperature, 1);  // Print temperature with 1 decimal place
  TFT_display.print(char(247));
  TFT_display.println("C");

  // Display humidity
  TFT_display.setCursor(20, 60);    // Set cursor position (x, y)
  TFT_display.print("Humidity: ");
  TFT_display.print(humidity, 1);   // Print humidity with 1 decimal place
  TFT_display.print("%");
}

void loop(void) {
}
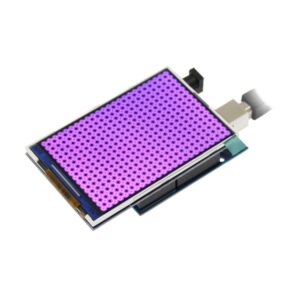
Step 5: Observe the Results
After a few seconds, the sketch will begin running.
- Observe the screen as the program runs. The DrawImage example will cycle through various colors, text sizes, shapes (rectangles, circles, triangles), and lines.
- If the display shows colors, graphics, and text correctly, your hardware setup and library installation are successful.
- If the colors are inverted, you may need to add TFT_display.invertDisplay(1); after the TFT_display.begin(); line in the sketch.
You can now modify the example code or write your own programs using the functions provided by the DIYables TFT Shield and Adafruit GFX libraries to create custom graphical interfaces.