Description
This is the HC-SR04 ultrasonic ranging sensor. It provides 2cm to 400cm of non-contact measurement functionality with a ranging accuracy that can reach up to 3mm. Each HC-SR04 module includes an ultrasonic transmitter, a receiver and a control circuit.
There are only four pins that you need to worry about on the HC-SR04:
- VCC (Power),
- Trig (Trigger),
- Echo (Receive), and
- GND (Ground).
You will find this sensor very easy to set up and use for your next range-finding project!
Features
- Operating Voltage: 5V DC
- Operating Current: 15mA
- Measure Angle: 15°
- Ranging Distance: 2cm – 4m
How Does it Work?
The ultrasonic sensor uses sonar to determine the distance to an object. Here’s what happens:
- The transmitter (trig pin) sends a signal: a high-frequency sound.
- When the signal finds an object, it is reflected and…
- … the transmitter (echo pin) receives it.

The time between the transmission and reception of the signal allows us to know the distance to an object. This is possible because we know the sound’s velocity in the air.

Pins
- VCC: +5VDC
- Trig : Trigger (INPUT)
- Echo: Echo (OUTPUT)
- GND: GND
Getting started with the Ultrasonic Module Sensor – HC-SR04
This sensor is really cool and popular among the Arduino tinkerers. So, here we provide an example on how to use the HC-SR04 ultrasonic sensor with the Arduino. In this project the ultrasonic sensor reads and writes the distance to an object in the serial monitor.
The goal of this project is to help you understand how this sensor works. Then, you can use this example in your own projects.
Step1: Hardware required
- Arduino Uno
- Ultrasonic Sensor
- Breadboard
- Jumper Wire
Step2: Connecting the Hardware

The following table shows the connections you need to make:
| Ultrasonic Sensor HC-SR04 | Arduino |
| VCC: | 5V |
| Trig: | Pin 11 |
| Echo: | Pin 12 |
| GND: | GND |
Step3: Library and example
There’s an Arduino library called NewPing that can make your life easier when using this sensor.
Download here: Download NewPing Library
Example:
Upload the following code to your Arduino IDE.
int trigPin = 11; // Trigger
int echoPin = 12; // Echo
long duration, cm, inches;

void setup() {
//Serial Port begin
Serial.begin (9600);
//Define inputs and outputs
pinMode(trigPin, OUTPUT);
pinMode(echoPin, INPUT);
}

void loop() {
// The sensor is triggered by a HIGH pulse of 10 or more microseconds.
// Give a short LOW pulse beforehand to ensure a clean HIGH pulse:
digitalWrite(trigPin, LOW);
delayMicroseconds(5);
digitalWrite(trigPin, HIGH);
delayMicroseconds(10);
digitalWrite(trigPin, LOW);

// Read the signal from the sensor: a HIGH pulse whose
// duration is the time (in microseconds) from the sending
// of the ping to the reception of its echo off of an object.
pinMode(echoPin, INPUT);
duration = pulseIn(echoPin, HIGH);

// Convert the time into a distance
cm = (duration/2) / 29.1; // Divide by 29.1 or multiply by 0.0343
inches = (duration/2) / 74; // Divide by 74 or multiply by 0.0135

Serial.print("Distance: ");
Serial.print(inches);
Serial.print(" inches\t");
Serial.print(cm);
Serial.print("cm");
Serial.println();

delay(250);
}
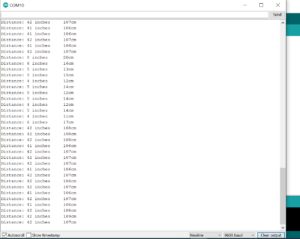
After uploading the code, open the Serial Monitor and you will get values that looks like this:
Package includes:
1×HC-SR04 Ultrasonic Sensor Module